


Introduction: In this article – part of an ongoing “Introduction to Genealogy” series – Gena Philibert-Ortega gives tips on how to label your family photos so that future generations can know and appreciate them. Gena is a genealogist and author of the book “From the Family Kitchen.”
Maybe you’re like me and your family history includes hundreds of family photographs: photographs you inherited, photographs taken by your parents, photographs taken by you. (Don’t even get me started on those dozens of photographs taken in the 1970s at the zoo… each photograph spotlighting a specific out-of-focus animal.) So now that you have this massive collection of family photographs, what do you need to do?
One thing I worry about is what happens when I pass away. Not that I’m planning to anytime soon – but when I do, who will inherit these photographs? The best scenario is that my photos are inherited by an equally passionate family historian. But how happy will they be with hundreds of photos depicting people and events that they don’t recognize and aren’t sure are even relevant to their family history?
We need to take time today to ensure that our photo collections are preserved and ready for the next generations who inherit them. One way to do this is to clearly label our photographs so that others can understand who they depict, thus allowing them to know who these family members are.
How to Label
First, we need to label or caption our photographs by writing on the back of the photo. The best way to write on the backs of photographs is to use a #2 pencil. Like in your school days, the #2 pencil is preferred because it’s not too hard nor too soft. And more importantly it won’t leave an indentation in the photograph.
When labeling photos, what you don’t want to do is to use anything that will “indent” the photo as you are writing. Hard leaded pencils or ball point pens, for example will do this. On newer photographs that have been processed on coated papers, pencil won’t work so you’ll need to use a non-bleeding archival quality marker. These may look like felt tip markers, but the tip comes out of a metal shaft. These are found in quality crafts and hobby stores. “These are not water-based as felt tip markers are, and will not bleed through the photograph,” notes Gary Clark of PhotoTree.com.
Make sure to give the ink plenty of time to dry. Do not stack the photos on top of each other as soon as you are done writing or you run the risk of the wet ink smudging or transferring to the other photo/s in your stack.
What to Label
It may seem like an obvious question, but what information should you add to the back of a photograph? Names of the people pictured are a start, but what else? This question hit home with me as I looked at a caption my dad wrote on the back of a photo of my mom, my brother, and me showing off our fish catch in the late 1970s. In the caption he used his nickname for my mom and not her real name. I wondered: in 20-plus years, would my kids or their kids know who that was?
So, some things to keep in mind when adding information to a photograph:
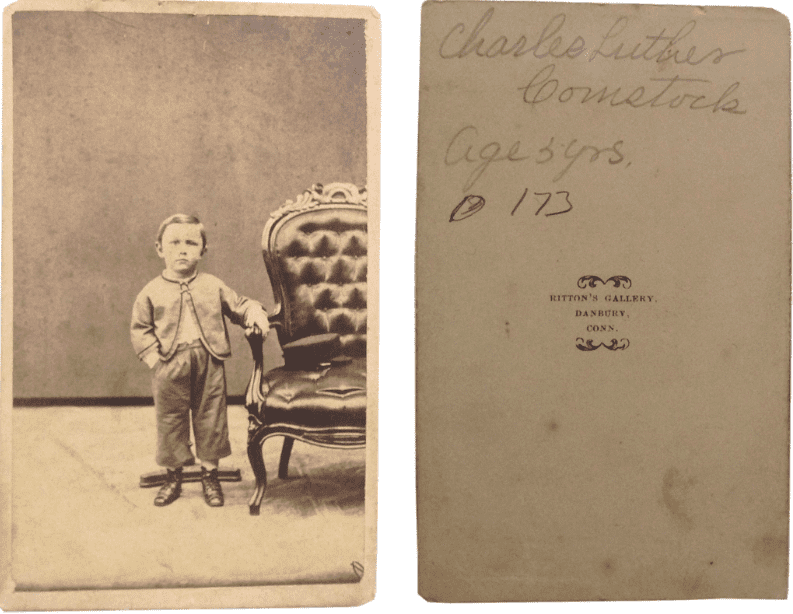
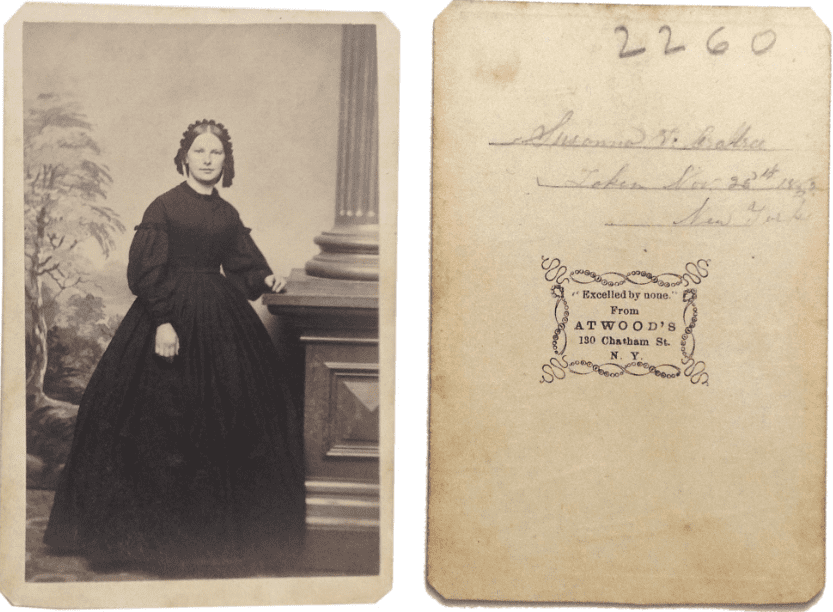
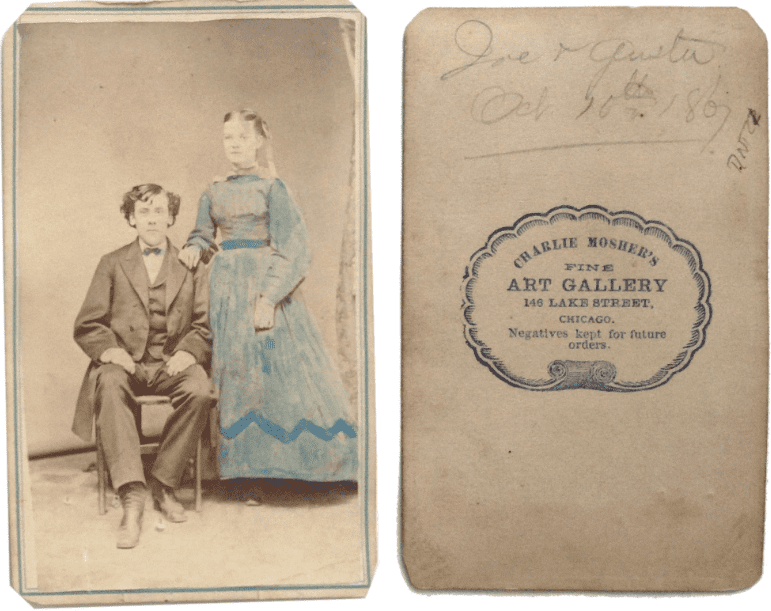
- Name: Spell out the person’s entire name. Writing only the first names does no good years from now if there are multiple people who share that name, or the inheritor of your photographs isn’t sure if that “Daniel” is a family member or a friend. If you use nicknames, also list the person’s given name. Today’s nicknames may be lost or unknown to others. And unfortunately, nicknames don’t always make sense in relation to the person’s given name – so they can render a person that should be known as unknown. Make sure to add a surname; this is especially important if multiple family members share a common first name. Don’t use relationship terms like “grandma” or “mom” since the reader of your caption has no idea who wrote the caption and whose mom that was. Photos labeled “Grandma Smith” do no one any good since all women who marry into your Smith family and have grandchildren would be known by that vague moniker.
- Place: Is that photo of your children in front of your house? List whose house it is and where it is located. Remember that in the future that house may not exist. If the photo was taken on a trip, write out where and when the photo was taken.
- Date: If a date or even a year or decade is known, identify it. Dates on photographs are important in establishing context for that person and better understanding their lives.
- Who/What Else Is in the Photo: Identifying the type and year of the car in the background, or the dog’s name, or the event the photo commemorates, can help provide the viewer with much-needed context.
Dos and Don’ts
You realize there are always some dos and don’ts when we are taking care of our family heirlooms, and photos are no exception. Here are a few tips to consider as you get ready to identify those family photographs.
Dos
Take time to label your photos now. You may believe you will remember everything about that photograph – but over time we forget dates, names of relatives we met once, and other details.
If you’re not sure about your older photos, consider enlisting other family members that can help. One way to do this is through a group email or posting the photos on Facebook and tagging family members that might be able to provide the missing information. The bonus to uploading mystery photos to Facebook is that those family members can now have access to photographs they don’t already have in their collection.
With group photos, make a “working” copy on a copy machine. You can write on the face of this copy identifying the subjects you know, and sharing it with others to help identify the ones you don’t know. Once the people are identified with confidence, then write the names on the back of the original photo, noting rows and position for each name.
Don’ts
It may be obvious to not use tape on your photos, but also keep Scotch tape (cellophane, clear, etc.) away from them because static electricity can sometimes attract them to the photo face – and ruin the photo.
Providing detail about a photograph on a separate piece of paper might seem like a good idea, but the paper can be separated from the photograph and not be available to future generations.
Label Those Photographs!
Labeling photographs is a great weekend project, or even something that could be done while enjoying your favorite TV show. Take some time to create a work area and label those photographs in small groups, then decide how they should be stored. After you label them it might be a good time to scan (both sides) and store them in archival safe boxes or albums. It can seem like a lot of work – but by putting in the time now, you ensure those memories will survive for years to come.
Note: Special thanks to Gary W. Clark of PhotoTree.com, who provided information for this article.
Related Articles: